Showing posts with label Happy Hauntings. Show all posts

Saturday, November 5, 2011

Mini Album in a Tin

Hi Everyone!!

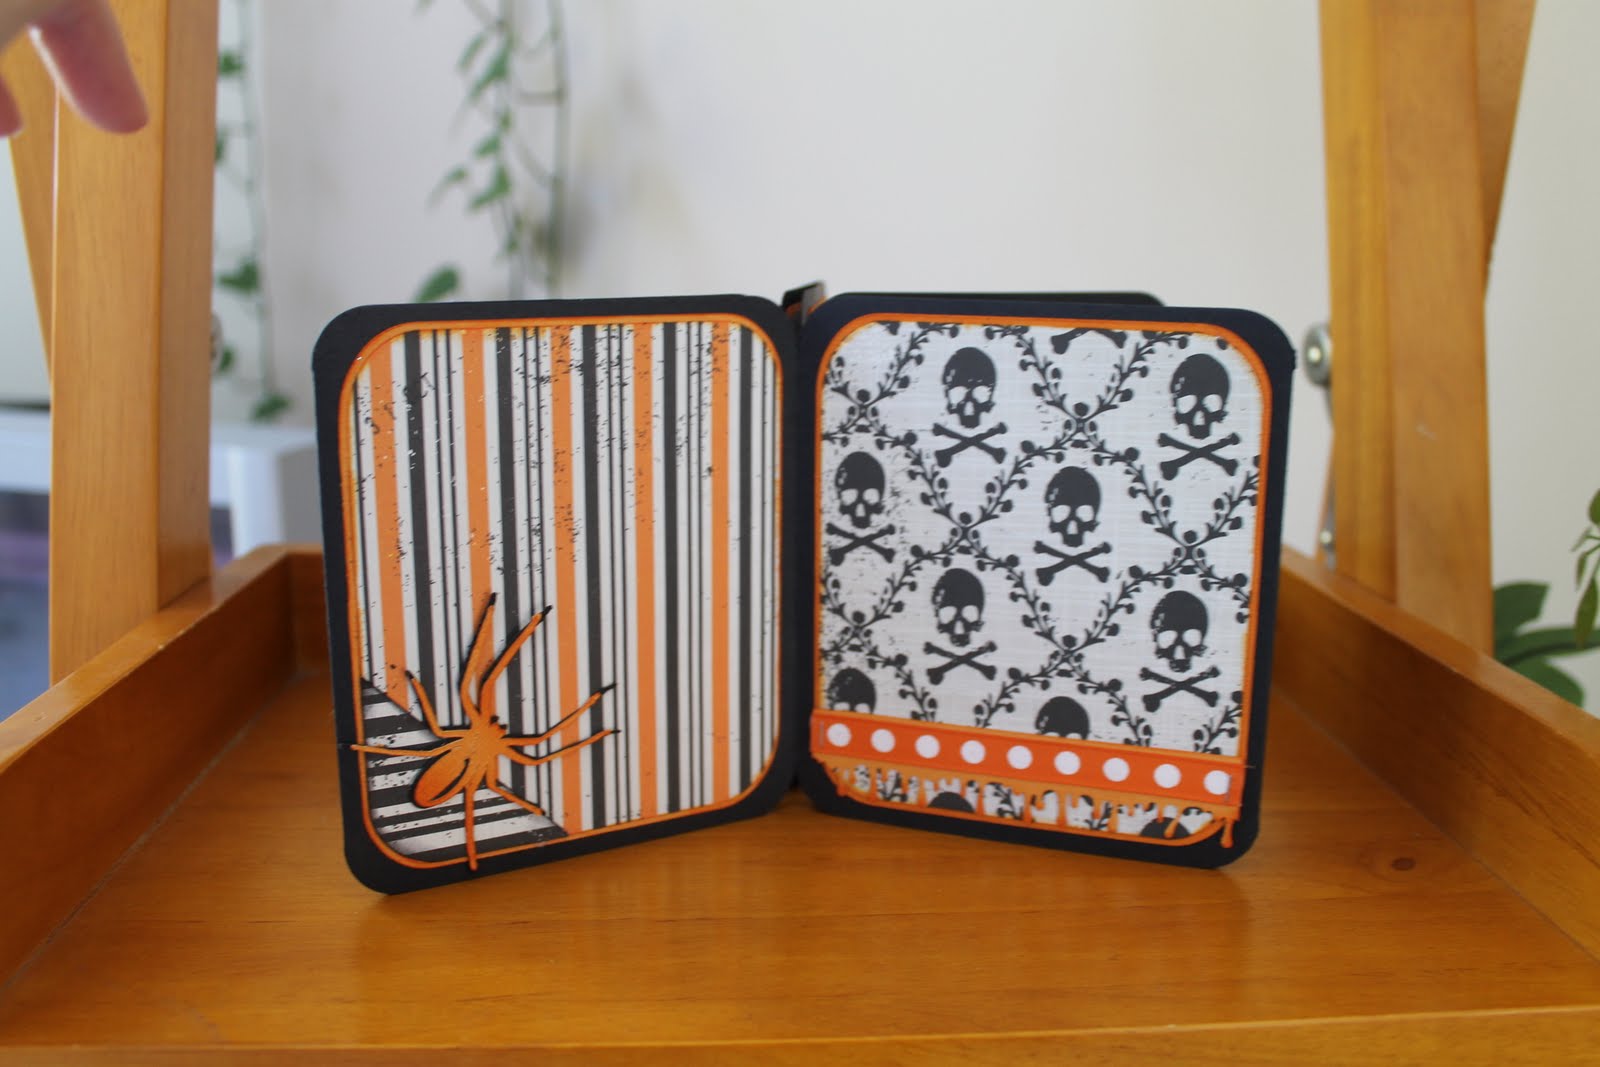
This is a simple project I made using a pre-made album in a tin...not sure of the brand though so if anyone knows please leave a comment for me. I like how easy this project was to do!!

Here is the tin!!


and the mini, super fun!!


And the backside of the album.


I used All Mixed Up cart and cut 16 3 1/4" x 3 3/4" rounded corner squares from Tim Holtz's Coredinations in orange and black cardstock from Cricut.

I then used All Mixed Up cart again and cut 16 3" x 3 1/2" rounded corner squares from Echo Park's Apothecary Emporium collection.I love this paper pack!!

The black cat on the front of the tin comes from October 31st cut at 2 1/2 ".

Spooky cut on the front of the album is from 3 Birds on Parade cut at 2".

Spider cut at 2" from October 31st.

The letters and shadows were cut at 1 1/2 " from Happy Hauntings. Top layer was put through the Cuttlebug using Swiss Dots folder.

I inked all the edges of all the squares and cuts with Tim Holtz's Orange Marmalade.

Stickers on the front of the tin are from EP's Apothecary Emporium collection.

Also used in this album:
Orange paper mini roses from China, Prima flowers, orange stickles, Martha Stewart dripping paint punch, Tim Holtz bat stamp from Stamper's Anonymous, swirly orange organza ribbon, black organza ribbon, orange and white grosgrain ribbon, candycorn brad from Doodlebug Design, pumpkin button from Buttons Galore, I-rock gems colored with Copic YR07, orange hemp twine, mini pumpkin charm, mini brad, ghost paperclip, and a puffy haunted ribbon slide.


Thanks for dropping in and have a great day!!


Monday, October 17, 2011

Cricut Spooks Alice and Tim!!

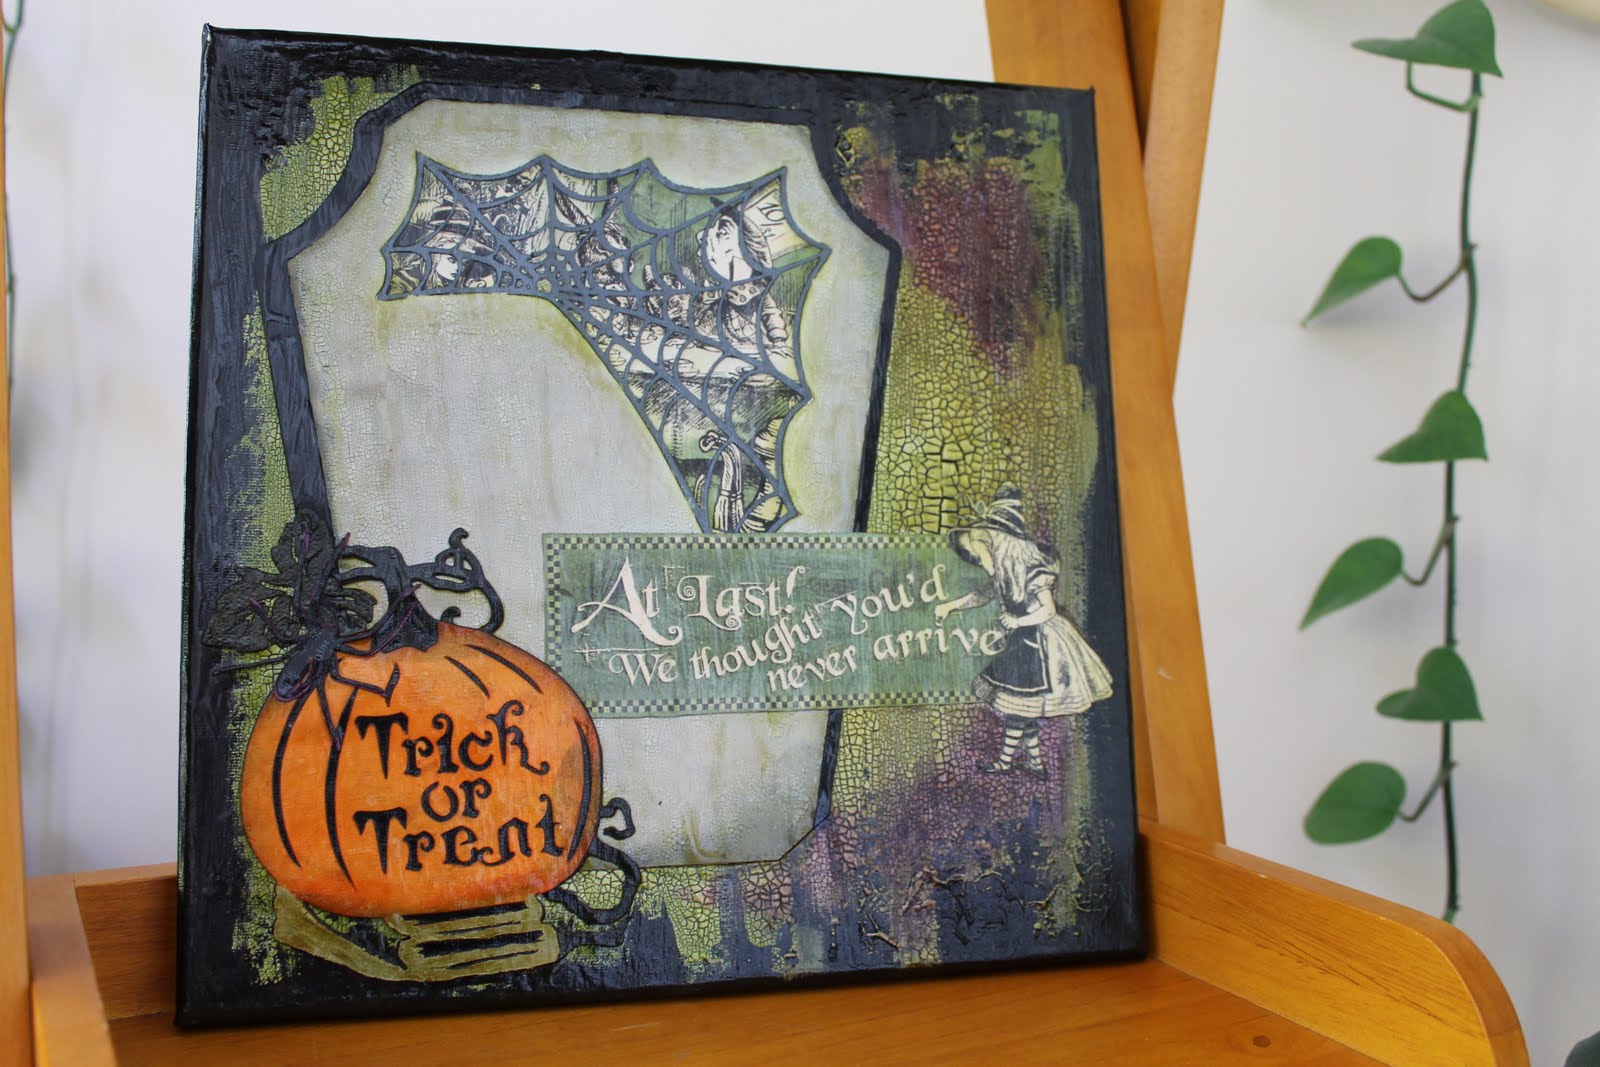
Hello Everyone! I have been wanting to create some wall art using a canvas and my Cricut for ages and finally found the time. Inspired by The Cricut Circle Blog and a Sister Cricut Circle member who loves Halloween, Miss Becky. I'm lovin' how this project turned out and I hope you will too!!


I started with a 12 x 12 pre-framed canvas which I painted Shimmer black. The paint was applied in one directional strokes. After the paint was dry I painted areas of the canvas with Tim Holtz's crackle paint, Shabby Shutters. After the Crackle paint started to crack, I hit it with my heat gun to speed the drying process. I then inked the Crackle paint area with Tim Holtz's Distress Inks. This was to be the base for my Cricut cuts.

After choosing two images from my Cricut Cart collection , a pumpkin and a gravestone I decided to switch things up a bit. I love using my Gypsy to alter the original Cricut cuts!

For the 5" pumpkin I used hide contour on my Gypsy to hide the window and some of the ribs on the pumpkin image from Nursery Tales. In their place I put Trick or Treat from the cart. I cut this layer in orange. I fussy cut out the stock, vines, leaves and stairs. The next layer I used black cardstock and hand cut out the leaf and stairs. I cut the third layer in grey cardstock, I inked the leaf with Shabby Shutters Distress ink and used Crackle paint on the stairs which I inked later to show the cracks . For the final pumpkin layer I chose black cardstock and handcut out only the leaf.

Being inspired by one of Cricut Circle blog challenges of late I knew I wanted a window in the gravestone. The gravestone is cut at ". I decided on a spider-web window. Using my Gypsy I placed a " spider web in the top-center of the gravestone. I cut this image twice, one in light grey cardstock and the other in dark cardstock. I removed the spider-web from the light grey gravestone and cracke-painted the gravestone using Pumice Stone Crackle paint. After the paint was dry I inked the paint using Distress inks. I took out the spider-web from the dark grey cardstock and glimmer misted the web. For the image in the window I used Graphis 45's spooky Alice in Wonderland. I hand cut the tea party image out to fit the window behind the spider-web and glues it in place.I used black card-stock for the base of the gravestone, and off-set the light grey windowed piece on top.

For the phrase I chose another part of the spooky Graphic 45 paper. I cut apart the title and knocking Alice to reposition her to better fit on my canvas. I inked the edges of these cuts using Tim Holtz's Black Soot Distress ink.

I used Mod Podge to adhere the pieces to the canvas. Then came the really scary part for me, I wanted to seal my work to protect it but I did not want to ruin all my hard work!! Well I took the plunge and put Matte Mod Podge over the whole canvas. I used a large artist's brush and was careful to only stroke over each area once as I did not want the water-based Mod-podge to move the water-based ink. The Mod Podge took on a green hue in some areas as I was applying it. I was very anxious during the drying process but it turned out great!!
Thanks for looking and have a Spooktacular October!!