Saturday, November 5, 2011

Mini Album in a Tin

Hi Everyone!!

This is a simple project I made using a pre-made album in a tin...not sure of the brand though so if anyone knows please leave a comment for me. I like how easy this project was to do!!
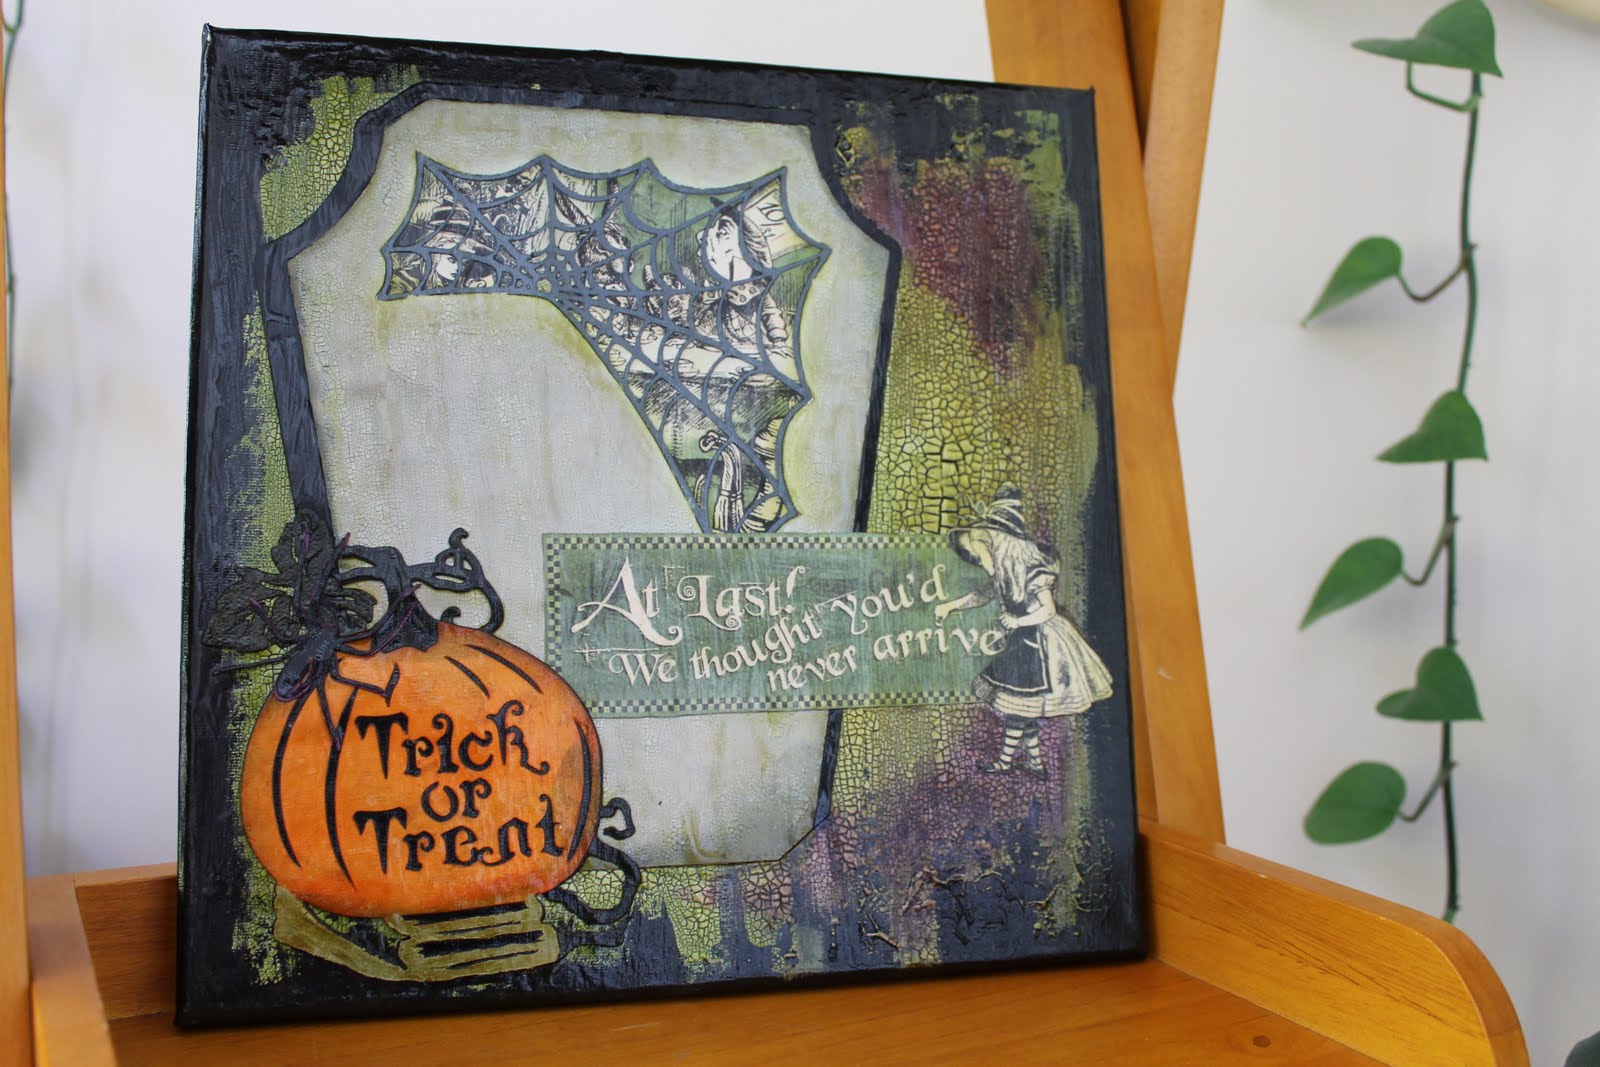
Here is the tin!!


and the mini, super fun!!


And the backside of the album.


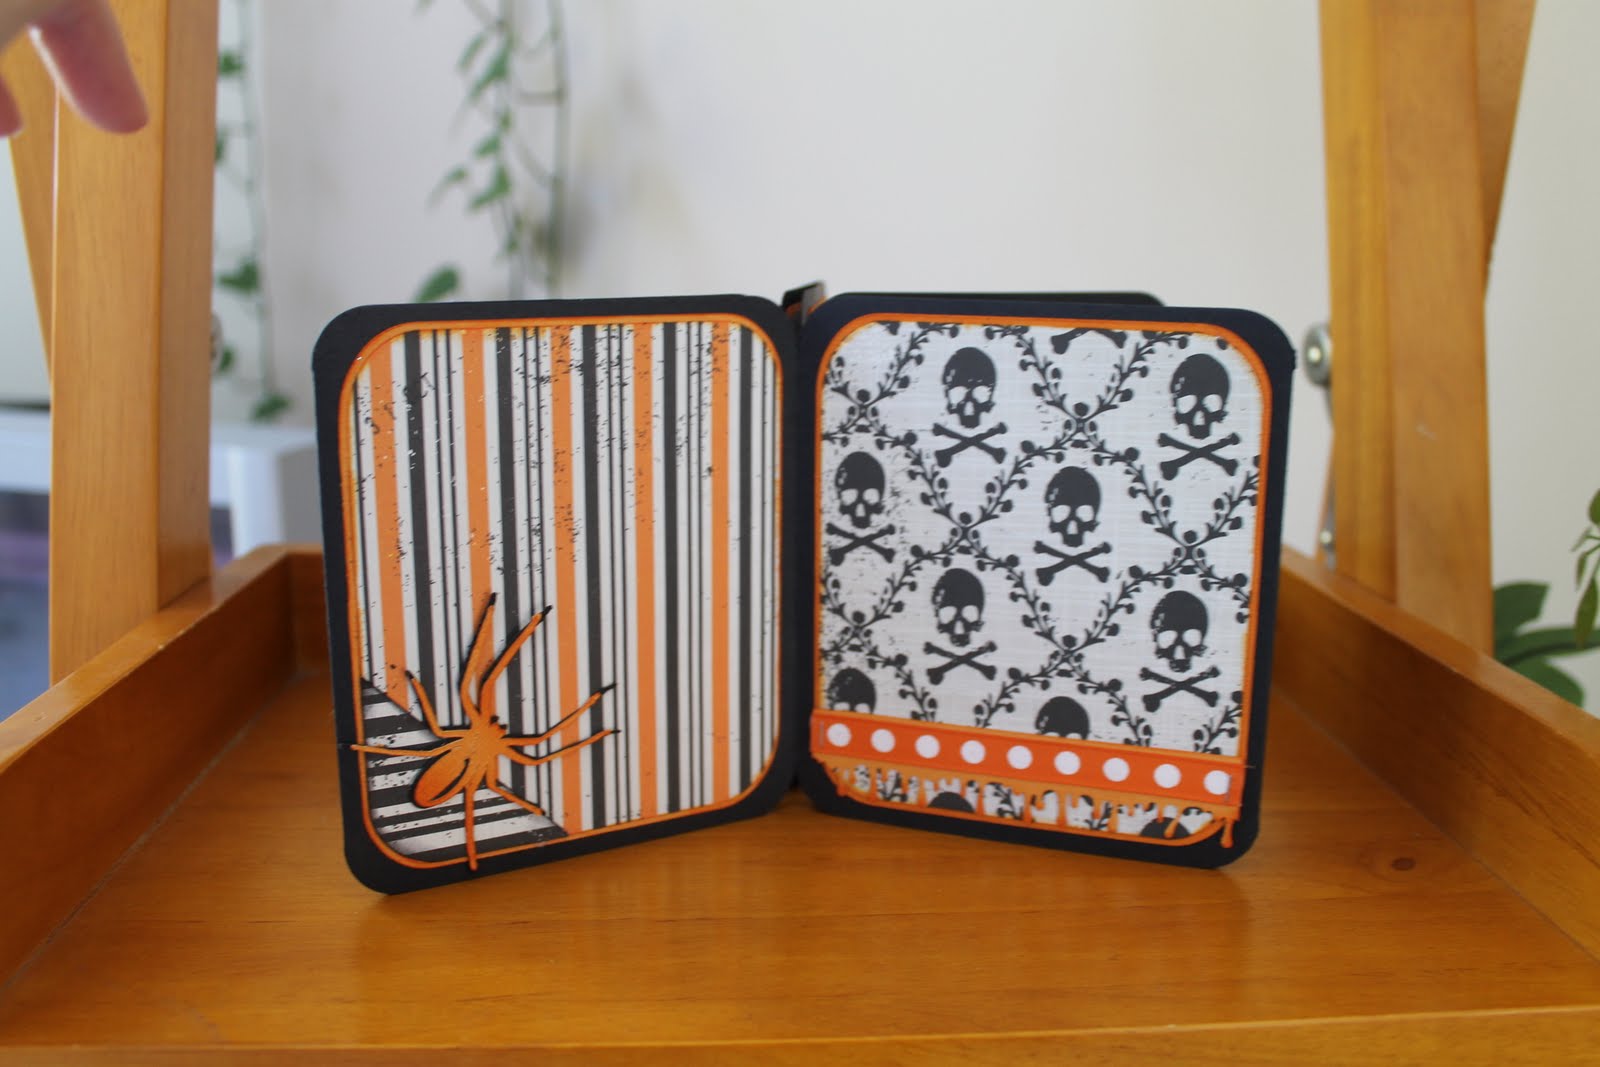
I used All Mixed Up cart and cut 16 3 1/4" x 3 3/4" rounded corner squares from Tim Holtz's Coredinations in orange and black cardstock from Cricut.

I then used All Mixed Up cart again and cut 16 3" x 3 1/2" rounded corner squares from Echo Park's Apothecary Emporium collection.I love this paper pack!!

The black cat on the front of the tin comes from October 31st cut at 2 1/2 ".

Spooky cut on the front of the album is from 3 Birds on Parade cut at 2".

Spider cut at 2" from October 31st.

The letters and shadows were cut at 1 1/2 " from Happy Hauntings. Top layer was put through the Cuttlebug using Swiss Dots folder.

I inked all the edges of all the squares and cuts with Tim Holtz's Orange Marmalade.

Stickers on the front of the tin are from EP's Apothecary Emporium collection.

Also used in this album:
Orange paper mini roses from China, Prima flowers, orange stickles, Martha Stewart dripping paint punch, Tim Holtz bat stamp from Stamper's Anonymous, swirly orange organza ribbon, black organza ribbon, orange and white grosgrain ribbon, candycorn brad from Doodlebug Design, pumpkin button from Buttons Galore, I-rock gems colored with Copic YR07, orange hemp twine, mini pumpkin charm, mini brad, ghost paperclip, and a puffy haunted ribbon slide.


Thanks for dropping in and have a great day!!


Sunday, October 30, 2011

A Snowman's Soul

Hi Peeps,

The Cricut Circle Magazine has a challenge every month. October's challenge is to follow a sketch in October's Cricut Circle Magazine. Also 3 Cricut cuts must be used, the prize is $150.00 credit at Cricut.com! And the best part is the winner is to be published in Cricut Circle's on-line monthly magazine!! Fun!!

I recently bought Santa's Village Imagine cartridge and I love it!! I knew I had to use that cart to make a card for this Challenge!! I really, really like this card!! ( I just floor myself!!! hehehehe)


I started with a 10" x 7" peice of white cardstock which I folded in half for the card base. Then I cut a 4 3/4 x 6 3/4 peice of white cardstock that I ran through the Cuttlebug using the Snowflakes folder. I used a Zig glue pen to trace all the raised snowflakes and covered the paper with Stampendous fine white iridescent glitter!! Ohhhh sparkly!! I inked the edge of the paper with Tim Holtz's new Gathered Twigs ink.

I then started up my Imagine, put in Sweethearts Cricut cart in one side and Santa's Village (SV) Imagine cart in the other. Next I cut the layered snowman images at 4".

I then chose and filled the 3 1/2" heart from Sweethearts with red and cut it with the Imagine. I then ran the heart through my Cuttlebug using the Swiss dots folder.

I picked the 4 1/2 scalloped circle shape from the Imagine's built-in shapes and filled it with a pin wheel candy pattern from Santa's Village. I did a second scalloped circle which I decided to color brown color also from SV.

I cut a 2 1/2 " tag from Sweethearts which I colored cream from SV.

Next I added a 5" x 7" and a 3" x 5" square from the Imagine's memory which I filled with a candy-cane diagonal stripe pattern from SV. One of the things that is really cool about the Imagine is that it prints the same pattern on both sizes accept the pattern image is smaller on the smaller square. This way the same pattern can look very different on different sized cuts. Clear as mud??? This is what I mean.


After all the cutting is done I used my Creative Memories circle cutter to take out the centers of both the scalloped circles. I cut off a 1 1/4 " x 4 3/4 piece off the 5"x 7" candy-cane printed paper. (I guess I should learn Craft-room...another time I guess)

I inked all the edges wth Gathered Twigs...love this new color!! I layered the snowman and the scalloped rings. I stamped the sentiment from Stampabilities on the tag, super-cute one I thought. I put the card together and added hemp twine to the paper strip at the bottom. I also tied the twine in a bow on the little tag. I stamped a sentiment from Stampabilities (Merry Christmas Love Hope and Joy to you always) on the 3 x 5 " piece of candy-cane paper for the inside of the card. I added 2 black Swarovski crystals to the eyes of the snowman with my I-rock. I also put 3 pearl accents from my stash on the candy cane strip in the bottom of the card.

This card went together in a snap!!


Hint: Stuck for an idea for a card...pull out your sentiments (stamps, rub-ons, stickers or die-cut phrases on Cricut carts) and work from there. Find a Cricut cut to match, choose appropriate papers and accents and there you have it!! Have Fun!!

Thanks for checking in on me....happy crafting and have a great day!!

Monday, October 17, 2011

Cricut Spooks Alice and Tim!!

Hello Everyone! I have been wanting to create some wall art using a canvas and my Cricut for ages and finally found the time. Inspired by The Cricut Circle Blog and a Sister Cricut Circle member who loves Halloween, Miss Becky. I'm lovin' how this project turned out and I hope you will too!!


I started with a 12 x 12 pre-framed canvas which I painted Shimmer black. The paint was applied in one directional strokes. After the paint was dry I painted areas of the canvas with Tim Holtz's crackle paint, Shabby Shutters. After the Crackle paint started to crack, I hit it with my heat gun to speed the drying process. I then inked the Crackle paint area with Tim Holtz's Distress Inks. This was to be the base for my Cricut cuts.

After choosing two images from my Cricut Cart collection , a pumpkin and a gravestone I decided to switch things up a bit. I love using my Gypsy to alter the original Cricut cuts!

For the 5" pumpkin I used hide contour on my Gypsy to hide the window and some of the ribs on the pumpkin image from Nursery Tales. In their place I put Trick or Treat from the cart. I cut this layer in orange. I fussy cut out the stock, vines, leaves and stairs. The next layer I used black cardstock and hand cut out the leaf and stairs. I cut the third layer in grey cardstock, I inked the leaf with Shabby Shutters Distress ink and used Crackle paint on the stairs which I inked later to show the cracks . For the final pumpkin layer I chose black cardstock and handcut out only the leaf.

Being inspired by one of Cricut Circle blog challenges of late I knew I wanted a window in the gravestone. The gravestone is cut at ". I decided on a spider-web window. Using my Gypsy I placed a " spider web in the top-center of the gravestone. I cut this image twice, one in light grey cardstock and the other in dark cardstock. I removed the spider-web from the light grey gravestone and cracke-painted the gravestone using Pumice Stone Crackle paint. After the paint was dry I inked the paint using Distress inks. I took out the spider-web from the dark grey cardstock and glimmer misted the web. For the image in the window I used Graphis 45's spooky Alice in Wonderland. I hand cut the tea party image out to fit the window behind the spider-web and glues it in place.I used black card-stock for the base of the gravestone, and off-set the light grey windowed piece on top.

For the phrase I chose another part of the spooky Graphic 45 paper. I cut apart the title and knocking Alice to reposition her to better fit on my canvas. I inked the edges of these cuts using Tim Holtz's Black Soot Distress ink.

I used Mod Podge to adhere the pieces to the canvas. Then came the really scary part for me, I wanted to seal my work to protect it but I did not want to ruin all my hard work!! Well I took the plunge and put Matte Mod Podge over the whole canvas. I used a large artist's brush and was careful to only stroke over each area once as I did not want the water-based Mod-podge to move the water-based ink. The Mod Podge took on a green hue in some areas as I was applying it. I was very anxious during the drying process but it turned out great!!
Thanks for looking and have a Spooktacular October!!

Friday, September 30, 2011

Cricut Circle September's Monthly Challenge

Wow!! It's been so long since I've posted I almost forgot how!! This summer has been busy!!
The challenge for the Circle this month was to use a "window" in our project as well as a number of Cricut cuts! The little inch worm on the window sill is from Nate's ABCs...so cute!! The window is from Elegant Edges. The bunny stamp in the window is a Happy Hopper by Stampabilities. I used copics to color her. The cardstock I used is part Bazzil Bling and part plain Bazzil. The two shhets of paper are from House of Three's Soiree line, words and diamond. Super fun colorful line, gotta love it!! I used Tim Holtz's Worn Lipstick Distress Ink to ink the edges.

Thanks for looking and have a great week!!

Wednesday, April 6, 2011

A Birthday Card Using Wrap It Up

Making "Man Cards" has always been so hard for me!! But using a sketch, a paper stack designed for men and my Cricut has made it fairly simple. Here is a picture of the sketch.

This is the result!! I love the Wrap It Up cartridge it has so many great cuts for cards.

Thank You for looking and have a great day!!

Tuesday, April 5, 2011

Going Green With my Cricut Cart Storage

When looking for a better way to store my ever-growing amount of Cricut cartridges I ran across this shelf outside our local movie rental store. The owner was down-sizing due to the fact many people are now duying digital copies of movies intead of renting DVDs or videos. She gave me the shelf for free!! I was happy to re-purpose it as a shelf for my carts!! It works perfectly!! I am able to see the carts easily as the bottom shelves are out further from the wall than the top shelves. The shelves are also exactly the right width for the cartridge boxes.

I also picked up 3 more shelves like this at a video store in town for a small price. I use those shelves fo storing my wooden stamps and my punches. So watch out for video stores closing or downsizing, bring one or two home and help keep these wonderful shelves from filling the landfills.

Sunday, January 16, 2011

A Sketch Challenge For ScrapTiffany!!

Wow!! I'm really on a roll trying to get some lay-outs done for my boys! Here is the sketch from ScrapTiffany that I followed.

The pictures I chose for this layout are of my son Matt who was born in 1983. He is about 1 1/2 in these pictures. He is really enjoying his chocolate cookies! What a mess!!

I used papers from DCWV Stack called Rock Star. The cardstock is Bazzill. I used the Sesame Street And Friends cart for the cookie jar and the cookies. The jar is cut at 3". The cookies cut at 2.5" The word Cookies is from the cart From My Kitchen cut at 2.5". The word chocolate is from the font on Paper Lace cut at 1.5" The scalloped edge is cut at 2" from the Easter 2010 Cart. All the edges of the cardstock cuts are inked with Tim Holtz Ditress Ink.Little half-pearls for accents.Paper rosette made from Bazzill paper.
I love this layout. Thank you for checking in on me!!

Getting started on the boys' scrapbook albums

I have finally made time to do scrapbooking pages for my boys! This year I want to make a scrapbook for all my kids and grandkids...this is a huge task!! I have 7 children and 3 grandchildren. There is one girl in the mix, our daughter who is our youngest. I have a few pages done for her and our youngest boy...the ones still at home but almost none of my older boys!! and only a couple of the grandbabies!!
I have gone through the older boys albums and scanned and printed a few choice photos.
I did this LO using the sketch by Jana Eubank for the Cute as a Button Circle weekly challenge. The challenge was also to use stamping and buttons as well as 2 cricut cuts.Here is the sketch.


In this LO is John who was born in 1989. He is about 1 1/2 in these pictures...the other photo is his father at the same age. They sure looked alike then and they still do.


For this project I used:
- Bazzill Flower stamped with black ink
- Bazzill turquoise cardstock
- Cricut green cardstock from the 12 x 24 pastel pack
- 3 white buttons from my stash
- Imaginesce paper Bubble Bath from their Baby Powder line
- white gel pen
- border printed and cut on the Imagine from JT cart at 2" (x2)
- flowers (2") from Mother's Day Bouquet printed and cut on the Imagine using JT
for clolors. Some stamped in black ink.
- Inkadinkado stamp
- Momento Tuxedo Black

Thursday, January 13, 2011

A Very Wintery Card

Hi everyone, as usual I'm a little behind on posting!! This is my Cricut circle weekly challenge entry. We are challenged to incorporate white paint, metal, and a snowflake cut on your project this week, as well as using at least 2 Cricut cuts.

The three little snowflake brads were silver and blue. I used white paint over them ...let it dry and sanded off the white paint on the raised parts. Viola!!! white and silver brads!! For the background I used a cicle of a silver cake mat from a grocery store cake. I cut off the sides so it would fit in my Cuttlebug and ran it throgh with the snowflake embossing folder. The heart snowflake is from Tie The Knot and is cut at 2".I added some Stickles to the snowflake. The little bird is from Stamping cut at 2.5". I cut the leaf off the branch as it is a winter card...no leaves!! I stamped the sentiment and the snowflakes on the bird using Momento black ink. The snowflake stamp is Inkadinkado. The sentiment is from My Pink Stamper. Silver bric brac from my stash on the bottom of my card. Thank you for checking out my blog!!

Monday, January 10, 2011

Always Fun!!

Today I'm pretty excited to have a chance to play in my scraproom! I have not done many projects using my Imagine, so I thought it was time. The picture I chose is a self-portrait my DD Daisy took of herself in the fall 2010. She was going through such a silly time when she liked to wear these nerdy glasses everywhere. (Thank goodness that has passed!!)

The background paper I printed with the Imagine using the Hopscotch cartridge. The mat was cut at 8.5" and color filled with a pattern from Best Friends. The flowers were printed and cut at 3" and the heart printed and cut at 1" are from Better Together. The letters are cut at 1.5 and 2" on the Imagine from a regular Cricut cart called A Child's Year. "U" and "Silly" are printed with patterns from Better Together. "Always" is colored with a pattern from "Kate's Kitchen". I embellished with pearls and metal accents.
I did this LO for the January Circle Monthly Challenge. The Challenge is to "scraplift" something from a previous post on the blog and to use 2 products from the Sponsers. I scraplifted this from The Think Pink Challenge Oct 8th by Kristen Swain. I used her LO as a sketch. I used 3 different papers from Cosmo Cricket. They matched well with Imagine carts done by Cosmo Cricket. The metal accents on the word "fun" are Imaginesce put on with the I-rock. Thank you for looking and have a great day!!

Thursday, January 6, 2011

A Valentine's Card

This little raccoon from Create A Critter is so fun!! He is cut at 4" . The box he is sitting on is from My World cut at 3.5". I used Glossy accents for the eyes after I colored them with a black Momento pen and a white gel pen. I also penned accents on the racoon and the hearts with the white gel pen. Sakura Metallics in silver and pink also used on the note and hearts. Shimmerz paint for the raccoon's outline and highlights. The note, envelope and hearts are from the Paisley cart. The note and envelope are cut at .75" and 1". Sentiments are unknown wooden stamps stamped with momento black ink. The lips are stamped with Momento red ink. The hearts are cut at 2". 1/8th pink ribbon from my stash for the note pull. I pop-dotted the hearts, the envelope and note.The nails are Imaginesce I-rock metals. The cardstock is Bazzill and Bazzill Bling (pink). The paper is from Simple Garden and Girly Girl collections by Studio 8.


Thank you for looking in on me!! Have a wonderful day!!

Tuesday, January 4, 2011

My Green Space

Hi Peeps, I must be yearning for warmer days! I love my summer gardens and so does the little tree frog that I caught on camera last season. This is a single 12 x 12 layout titled " My Green Space"


Supplies used:
- White and green patterned paper from my stash.
- Pink, brown, white and yellow paper from my stash cut on Cricut at 11" using
scalloped circle from Essential Accents. Cut circle in half. Colored yellow with
green Copic marker.
- Pink Bazzill cardstock for background and flamingo from Serenade cut @ 6".
- Brown Bazzill cardstock for flourishes and flamingo from Serenade cut @ 6".
- Green Bazzill smooth cardstock for letters cut @ 1.5"(Green Space)
and 2"(My) using the Songbird Cart. "Green Space" welded on the Gypsy.
- White Organza ribbons knoted through 3 green Basic Grey buttons.
- 1/8" pink and brown Grosgrain ribbon.
- 3/4" green and pink Grosgrain ribbon.
- 1 White corduroy brad.
- 2 green Prima Obsession Flowers that where sprayed with Frost Shimmer Spritz.
- Glossy Accents used to stick fine Martha Stewart brown glitter to flourishes.
- Pop-dots to pop the flourishes, words and flamingo.
- Atg used to stick it all down.
- White gel pen for faux stitching on paper edge and flamingo.

I made this page for the My Pink Stamper Design Team Challenge. The challenge was
to use a favorite Cricut cart ( mine is Serenade, love those flourishes!!)
and Robyn's favorite colors pink, brown and green and another optional color, I
chose white. I love how it turned out!! Thanks for checking out my blog!!

Sunday, January 2, 2011

A Box I made for my Son to hold his important stuff!

Hi Everyone! Happy New Year!! I can't believe it has been so long since I posted!! I have been so busy with the holidays,crafting,travelling, baking, company for a week and new puppies!! Yes baby puppies!! Our dog Dizzy, a Pomeranian had pupppies from a Chinese Chin on Dec 20th!! 5 of them, super cute!! I'll share pics later!!
This is a box I found at a second-hand store that I have re-purposed for a storage box for our son Dustin. I would like him to store his paystubs, S.I.N card, medical card etc....all the things he should not lose in his bedroom!! He is 14 now and works part-time at the sawmill! The box had a built-in magnetic clasp on the front closure...cool!! Boys/men paper craft items are always a challenge for me. I like bling, pink and flowers so I really have to think (ouch!!) to create a project like this!! His bedding is red, black and grey so I chose those colors for the box and it kinda rolled from there.


The background paper is smooth black cardstock that I stamped with Inkadinkado stamps using silver and black ink. The paper on the cover of the box is DCWV. The star, bird and the arrow are cut @ 2" on core'inations paper (red under black) and grey cardstock, using the Gypsy, Expression and the Home Decor cart. The letters and shadows are from Cuttin' Up, cut at 1" using red and black cardstock and inked with Tim Holtz's Black distressing ink. The heart is from a cuttlebug die. All the shaped die-cuts were run through my cuttlebug in an cuttlebug embossing folder. Core'inations cardstock is soo cool used like this!! I used my I-rock to add the silver metal dots and the gem in the bird's eye. The inside of the box is lined on the bottom with silver cardstock that has been embossed in the cuttlebug in a checkerplate design. So manly!! **Note to self** I really like that effect!!!
I did this project for the Cricut Circle Monthly Magazine Challenge!! Have a great day!!